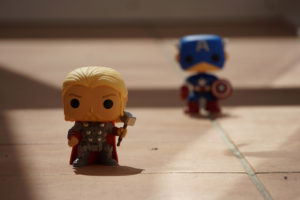
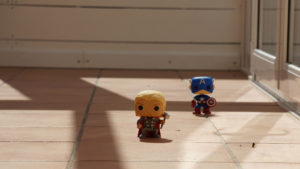
In this exercise we are asked to film or photograph two objects to show the change in depth of field.
Humans have two eyes and therefore are able to see with binocular vision. Each eye sees the same scene but from a slightly different angle. When the two slightly different images are sent to the brain, the result is processed and perceived as one image with depth. In effect, binocular vision allows us to work out where objects are in relation to us, especially if they are moving towards or away from us.
When someone is viewing a movie, they are looking at a flat screen with no ‘real’ depth cues. All the depth cues come from how a scene is constructed. The scene can be made to look as if it has depth or can be made to look flat.
I used two Marvel Superhero figures (with apologies) as my models for this exercise. I first made a short video using the Panasonic AGAC90 but was not satisfied with the result, so made some still photographs as well.
This is the video:
What I realized with this video is that I needed to be quite a bit further away to get a very obvious depth of field change. As it is, you can see Captain America going out of focus as I zoom in on Thor, but it’s a marginal difference. The same is true when I zoom out again; Captain America comes back into focus but it’s a subtle change. Having spoken with someone who has more experience with the camera they advised that to get the type of depth of field I was after, I would need a lot more space and the characters would need to be further away.
I remembered that I had a clip that I had shot as a bit of an experiment when I was filming my first assignment. I had zoomed in on my characters from quite a distance and I got some lovely blurring of the background. When they moved out of the frame, the camera refocused the background. I couldn’t use it in the assignment but it was a worthwhile experiment nonetheless.
In the absence of a good video clip, I decided to also take some photos where the depth of field changed. Yet again resorting to superheroes. The apparent distance between the two characters changes as you zoom out with the characters looking as if they have moved further apart.


I took the action outdoors and experimented with varying depth of field, to see what the effects would be.


This set was interesting in that the distance between the two characters seemed smaller when I was focused on the front character and further apart when focused on Thor.
Changing the depth of field is one way to create a sense of depth in a film, however there are other techniques that may be used. In Directing – Film Techniques and Aesthetics, Michael Rabiger (2013:157) explains that shots that are designed to create a sense of depth are called deep frames, whilst shots that are aimed at flattening out a space are called flat frames.
Techniques that are used to create depth include:
Relative size – If two objects that the audience knows are the same size in real life are positioned so that one looks smaller than the other, then we also know that one of them is further away. A line of trees, or lamp posts or soldiers receding into the distance are all good examples of relative size to show depth.
Objects overlapping – if objects in the frame are placed so that they obscure other objects a sense of depth is created.
Receding planes – this is where objects that are not necessarily of the same size, are place in the foreground, mid ground and background. Although not as effective as relative size, it still creates depth.
Lighting is also used to create depth and will be covered later in this part of the course.
Bibliography
Rabiger, M. and Hurbis-Cherrier, M. (2013) Directing. Film Techniques and Aesthetics. (5th Edition). Burlington: Focal Press

Excellent work. I love the photos and oh my gosh those superhero’s are so cute! I need to get some ^_^
Thanks Chloe. ‘Cpt America – Civil War’ comes out in 10 days, so some in our house are getting over-excited 🙂